

In this article, I will continue reviewing how to draw trees in plan, advancing on some of the concepts from our original tree drawing exercises and developing some other graphics to make our base plans stand out.
The types of trees we will be drawing today still aren’t considered specimen trees, meaning they won’t be the focal point of our garden, but these trees will still serve an ornamental purpose and we should make sure they look their best.
I also want to take the time to show you a variety of different types of trees, so that depending on your own drawing style, some might work better than others for your project.
In this article, we will be using the following tools: a circle template, lead holder, and Copic Multiliner Pen Set. I will start by drawing five 2” wide circles as my guides.
Double Bordered Tree With Branching
For this first tree we are going to draw a double-bordered outline. This style is simplistic, but adds a bit of boldness and definition to the edges of the tree so that it can stand out from its surroundings. We will start with a wider border by using the BM Copic Pen (brush medium) in order to create a nice wide outline for the outer edge. Next we will come back with a finer point pen, 0.8 Copic Pen, and offset the initial line to create a nice double bordered edge.
Finally, we will dot the center and place some straight lines radiating from the centerpoint in order to get a branching or more graphically appealing effect. These lines can be in any direction or orientation you would like, but don’t overdo it. The purpose of this style is to be simplistic.
This would be a good symbol for some of the more traditional ornamental street trees like honeylocust, pin oak, or ginkgo.
Cookie Monster Tree
For our next tree, we will create a more defined structure for the canopy by taking big chunks out of it, as if someone was biting pieces from it. I like to call this our “Cookie Monster Tree”. This will add a little more interest around the edges of the tree and can work well in small groupings of similar smaller species such serviceberry, dogwoods, or lilac. Even cherry or apple varieties can look nice with this type of drawing style.
To start, we will use our 1.0 Copic Pen and just follow the outer edge pretty closely and then create reverse “u” into the interior of the canopy to create the cut out effect.
When you do the cutouts, make sure that you are drawing some of them small, some medium, and some large. You don’t want to create the cutouts all the same size, as this will make the tree much to uniform and unnatural.
A modification of this style is to combine it with the previous style of the double border. So simply start with the thicker outline and work backwards creating the same effect only with the cutouts added in. Then you can add the branching if you so desire.
Zig-Zags & Dots
Another style of tree that can look very realistic and interesting is one that creates more texture within the canopy. For this next style, we are going to create a series of zig-zags or crinkles that run throughout the canopy and add a three-dimensional look to it.
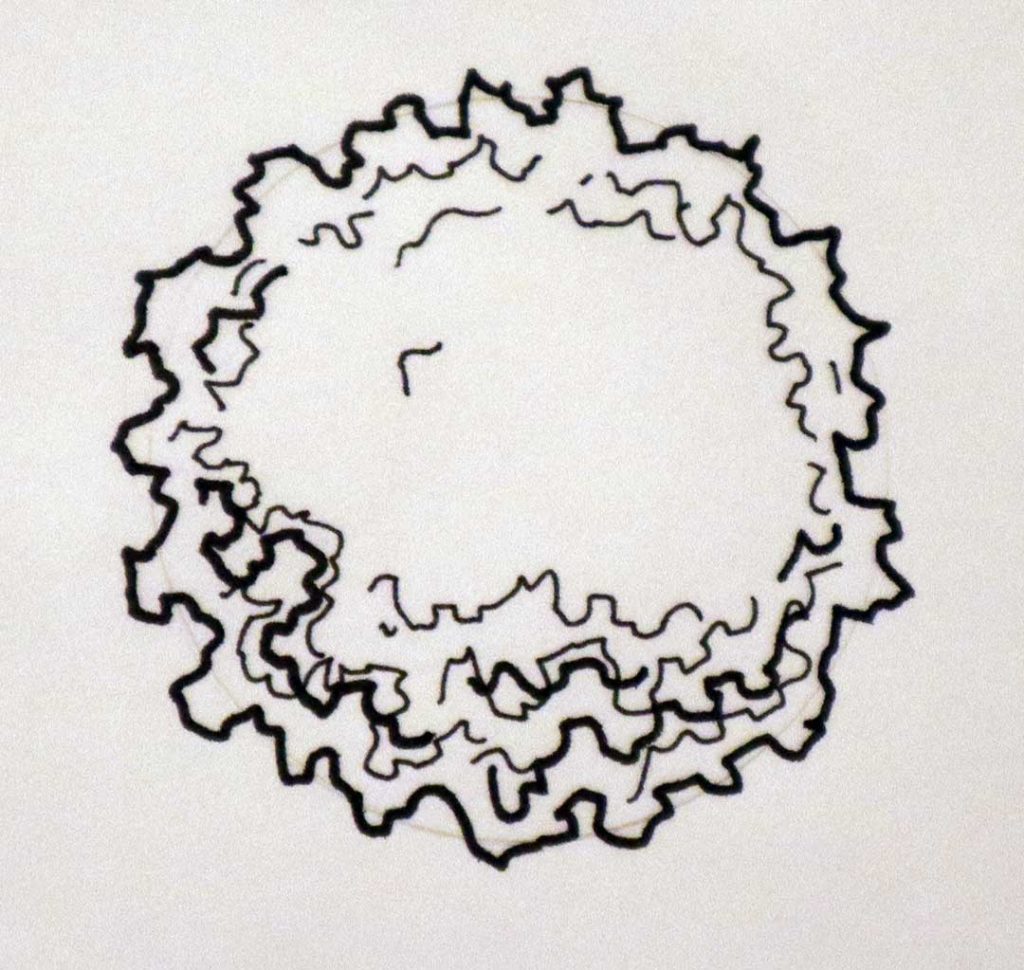
Zig Zag Tree 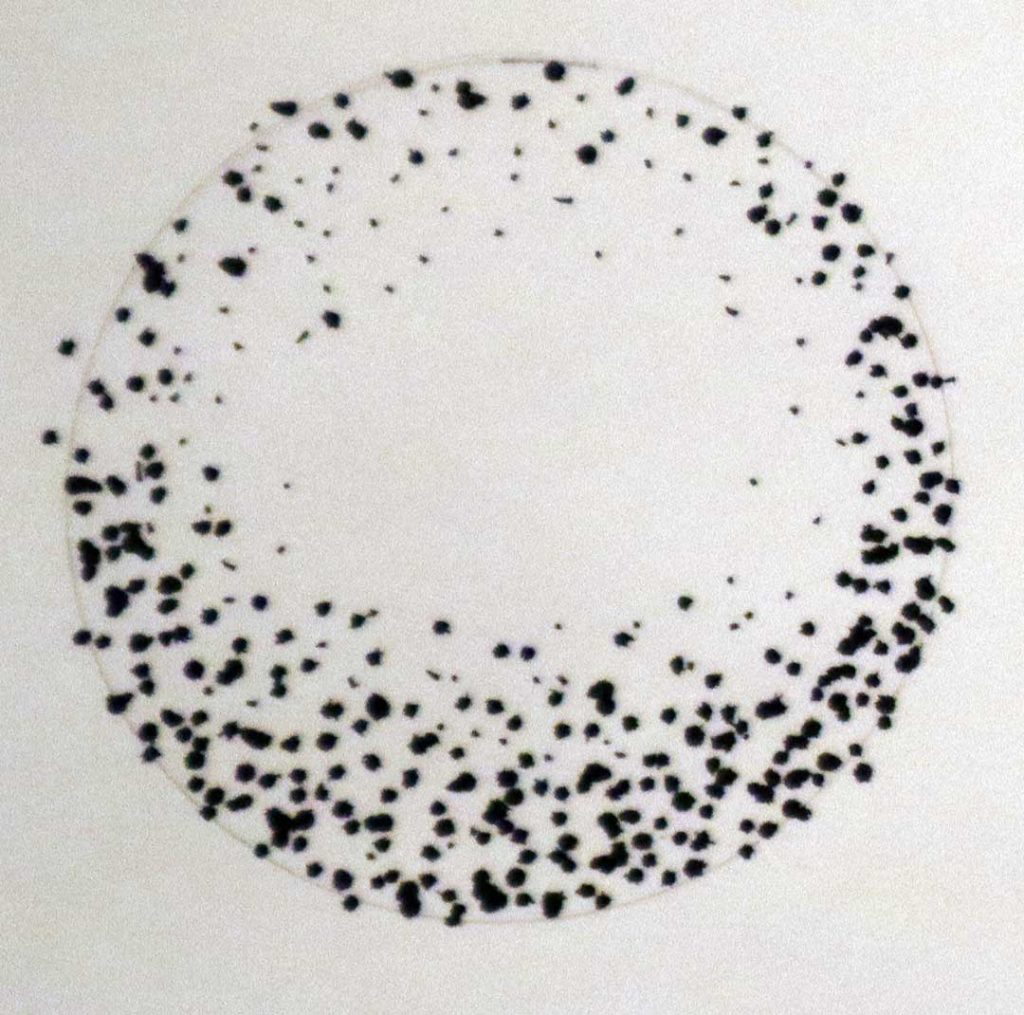
Stippled Tree
So we will start with the thick lines around the canopy using our 1.0 Copic Pen, and work our way to thinner lines down to 0.5. We also want to make sure that we create a depth effect by adding a bit more of the zig zags on one side that the other, as if there is a point of light shining from one direction that creates three-dimensionality.
When I am drawing this style I like to thinking of a crumpled up piece of paper as it helps me visualize the type of effect I am going for.
You can also create the same effect, but with stipples or dots that act as individual points for the leaves. These effects can be good for all sorts of shade trees like maples, birches, or oaks.
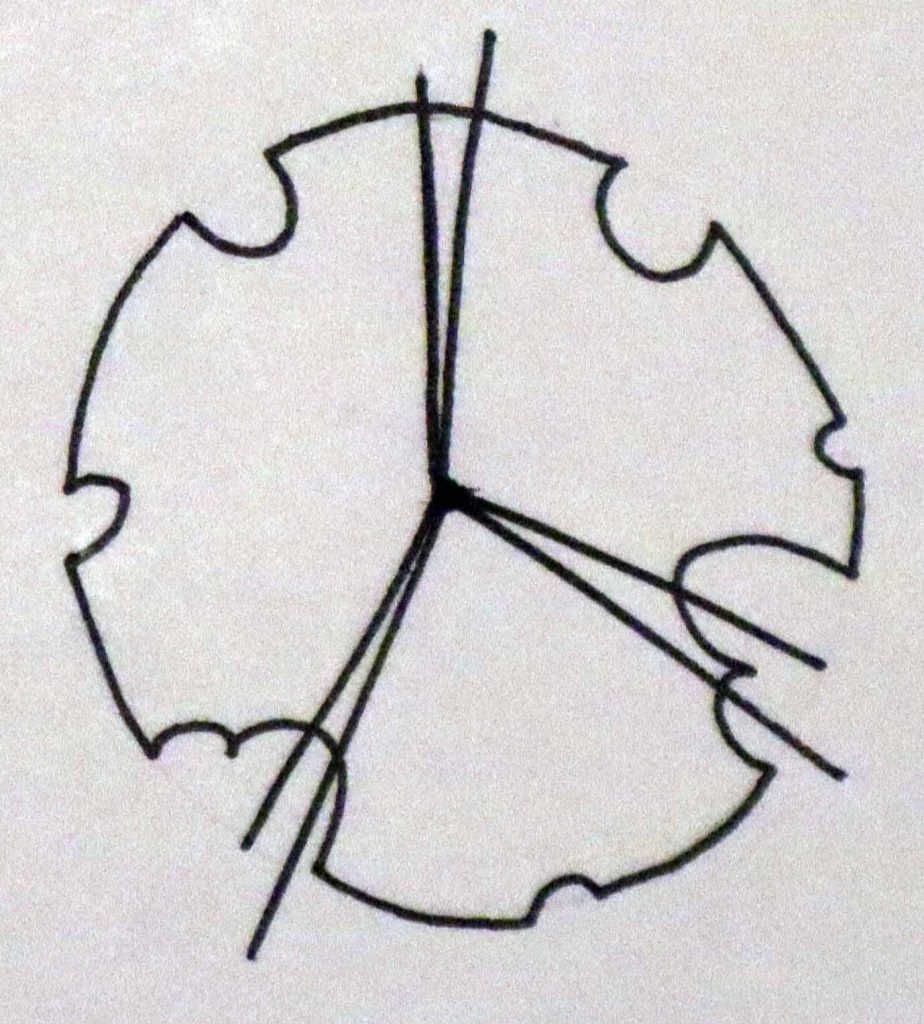
Modern Architectural Tree
In some cases, the design might be more conceptual or abstract in its style and therefore would necessitate creating a tree that is a little different than the ones we drew previously. For this tree, I like to call it more of a modern architectural symbol, because we will be using five to six straight line segments to form the overall tree shape.
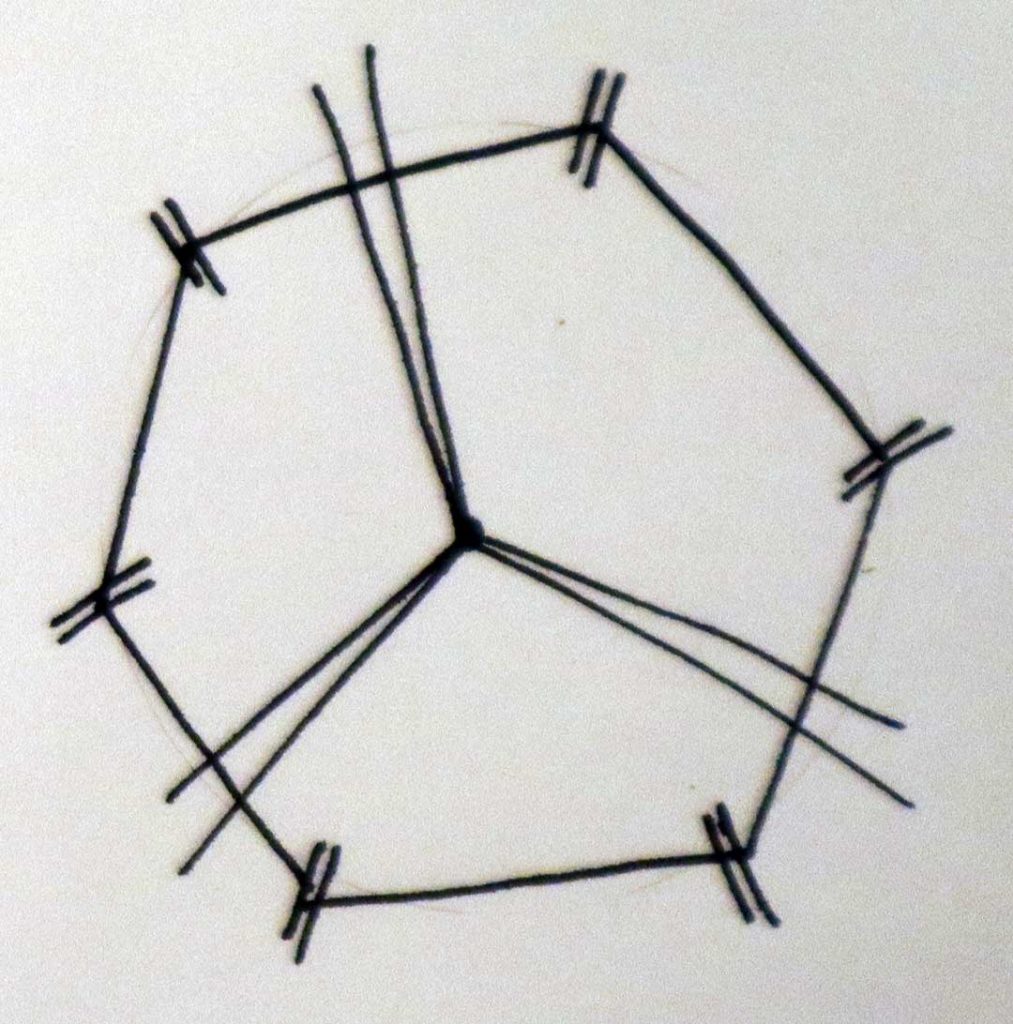
So we will start with our circle template guide and then create 5 straight lines to connect around the circle. From there, we will add a bit of flair at the connection points in the form of some straight lines. We then add branching as we saw before.
If you would like to, you could also add a double-edged border as we did before to make it look a bit more complex.
This symbol is interchangeable with many of the others we used before, but for those plans that require a more modern or architectural look.
Open Canopy Continued
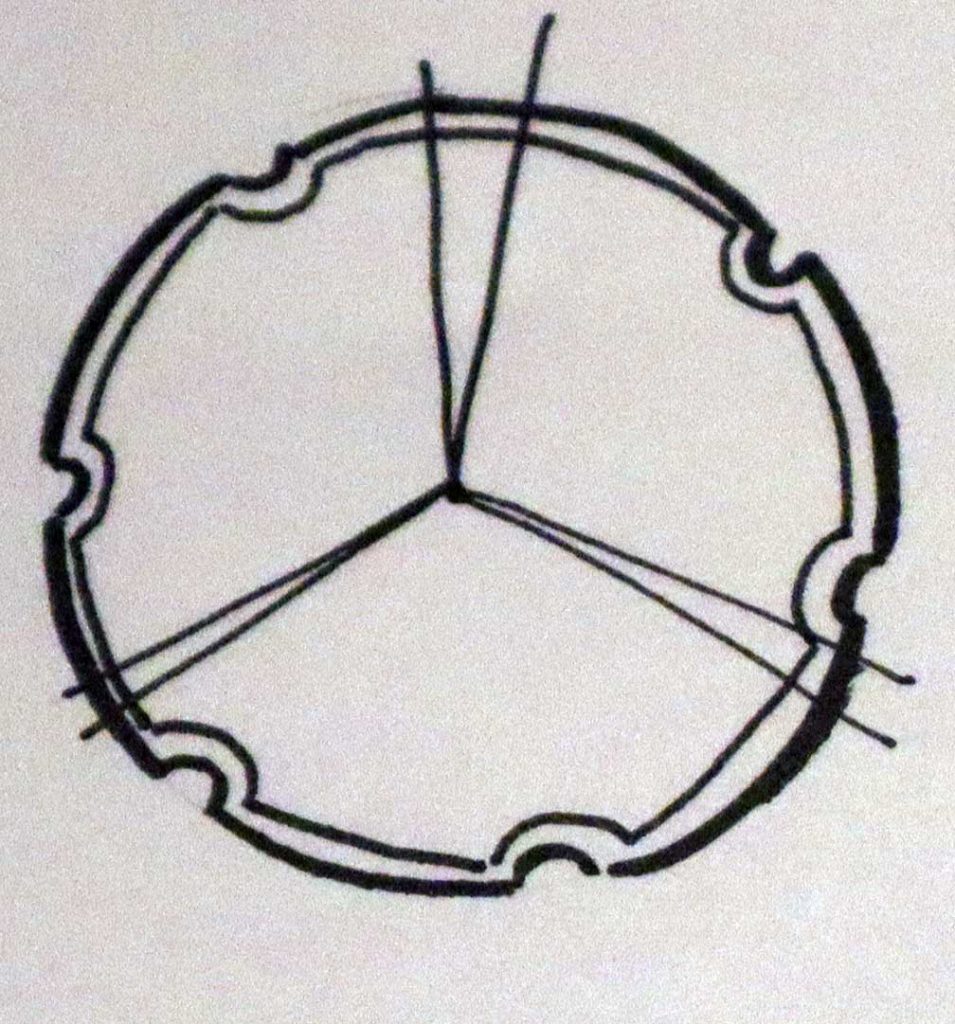
For our final tree we will draw a style similar to one we’ve used before in other videos, that is an open-canopy style. For this drawing we will start by separating the tree into three segments, a large, medium, and small, and then add branching to connect them.
In the last article, we just simply left the tree like this, but this time we are going to add cutouts in the larger and medium segments as if we are looking through the tree to the branches below. This will add a bit more complexity and flair to the tree and give it a more robust look.
This can be a nice symbol for trees that may not be specimens or focal points, but are still beautiful elements in the landscape that you wish to highlight.
As you can see there are many ways to draw ornamental trees in the landscape, in both a simple and complex way. When selecting a style of tree to draw, make sure it fits with the overall aesthetic of the design and makes sense for the application you are using it for. Most importantly, remember that practice makes perfect and that if you want to become better at drawing landscapes, you need to practice at it a little bit each day.
If you found this helpful, please be sure to look at the other articles within the beginner’s drafting section. Or, head over to the professional or design resources to find more information to help you become a better landscape designer.
____________________________________
Important Legal Disclaimer: This site is owned and operated by Draftscapes. We are a participant in affiliate marketing programs designed to provide a means for sites to earn advertising fees by linking to participant vendors. Affiliations include Utrecht Art Supply and Amazon Associates. Draftscapes is compensated for referring traffic and business to these companies. Recommendations for products or services on this site are not influenced through the affiliation.