

Whether you are just starting your journey into the workforce or you are looking to pursue a Master’s Program in Landscape Architecture, a well-developed design portfolio is essential. Over the past fifteen years, I have reviewed, edited, and created hundreds of Landscape Architectural and Garden Design portfolios for students and business professionals.
In this article, I am going to review five key tips I have found helpful in order to create an eye-catching portfolio for all purposes. From my experience, students and job candidates that focus their attention on these items are more successful in achieving their desired goal.
Tip #1: Use A Customizable Format
When I was a student there was only one portfolio format available for students or job applicants which was a physical copy, or book. I would spend hours printing, binding, packaging, and mailing the portfolios to design offices or universities with the understanding that most of them would never be returned. Not only was this time-consuming, but it was also very expensive.
Nowadays, anyone building a new portfolio has the ability to publish in a variety of formats with highly customizable and responsive options. If you are looking to cast a wide net for your future job prospects, it is worth dedicating the time to create a more functional and customized portfolio for viewing. So how exactly do you do this?
The first step is to consolidate all of your materials into digital image-files. For the purposes of ensuring both high-quality and fast uploading images, be sure to save all of your images as TIF’s, JPG’s, and PNG’s – TIF files will be the highest-quality, but slowest uploading, while PNG’s will be the lowest-quality, but fastest uploading. I will cover more about optimizing images in Tip #4 below.
You should have at least three different image file formats for each digital image you wish to include in your portfolio. For any hand-drawn plans or drawings you wish to include – and I would definitely suggest including hand-drawings – take them to get professionally scanned. It may cost more than a photograph, but unless you have a high-quality DSLR camera (which run upwards of $750), the image quality will simply not match a scanned color copy.
Once you have all of your images ready, you will need to organize them into the portfolio itself. I would suggest using the software Adobe InDesign, as it is the most versatile software to format the portfolio, but it also makes it extremely easy to export into many different file types. This brings us to the main point of Tip #1 – using a customizable format.
Some employers wish to see hard copies, while others prefer digital files, or even websites. For the hard copy portfolio, make sure you have small size copies (8.5” x 11” or smaller) to give or send the employer or client. These are a “sunk” cost, or “opportunity” cost, which you should understand that you will not get back. However, you should also ensure you print and keep a large-copy portfolio for yourself (roughly 18” x 24” or larger). This larger portfolio should travel with you during interviews and not be given to anyone – it’s a single copy that is kept with you permanently.
For digital files, most designers assume a PDF file is the only file-type worth creating; however, you may be surprised how many employers or customers would actually benefit from other styles as well. First, if you are using a PDF file for your portfolio, please make sure it is a responsive PDF – meaning that it has a hyperlinked table of contents which can be linked to different sections of the portfolio. This way clients or employers can easily travel to areas of the portfolio that are relevant to their interests.
Outside of PDF’s, you should also think about publishing your portfolio as an ePub file (electronic publishing file). An ePub file is primarily used for e-books and can easily be adapted for your portfolio. Employers can easily view these files on tablets or other ebook digital platforms and the file can be exported directly from Adobe InDesign. The ePub file can also be made responsive, which provides the same advantages as a smart PDF file.
Finally, don’t be afraid to develop your own professional website for your design portfolio. Many freelance artists, architects, and other design professionals create these sites for the purposes of showcasing their projects and skills – landscape architecture and design is no different. Within the website, you can also link to PDF and ePub downloads if necessary.
Future employers will find it very valuable to have a designer that showcases the ability to navigate all of the digital platforms and create their own professional website. It may just set you apart from the traditional hard copy portfolio. If you haven’t done so already, check out my other article on the basics of developing your professional website. It can be found here.
Tip #2: Highlight Your Professional Skills
What you might find to be the most important aspects of landscape architecture or design may not be what your future employer or client finds important. I’ve seen it many times, where students or landscape professionals focus too much on the concepts and design-styles they created without ever highlighting their technical or professional skills.
For employers, they are looking for a new hire to provide value to their office. This means they want someone who is trained in the technical nature of the profession and can hit the ground running on projects that need computer drafting, plant selection, or contract administration. These are definitely not the “sexy” parts of landscape architecture, but they certainly are the most valuable skills a new designer can have.
When formatting your portfolio, make sure you are illustrating the skills you have and how you have practiced them in your collegiate or prior professional experience. You can integrate this into your portfolio in a number of different ways.
First, you can format your portfolio based on the design method or project skills used. For example, perhaps your initial section focuses on showcasing your AutoCad proficiency, while other sections highlight construction details, photo-rendering programs, or plant specifications.
Another option is to add a quick snippet within the project summary where it clearly states which software or skills are being used to create the images being shown or what specific role you played in the development of the project.
No matter how you format your portfolio, it is a good idea to ensure you showcase the value you would bring with you for the company. These skills not only showcase your professional readiness, but can serve as a springboard for further conversation during an interview.
Tip #3: Use Text Intelligently
Unfortunately, there just aren’t enough hours in the day for hiring managers to comb through detailed full-page project descriptions for every applicants portfolio. When reviewing several portfolios, an employer will look very favorably on a candidate that synthesizes the most essential elements into a few sentences, and possibly some supplemental image captions.
I often see this mistake with my own design students, where they will sacrifice image space to add additional text which they feel is “crucial” to understanding the concept of their design. Sadly, this just highlights some overall poor design choices.
First, your images should speak for themselves. If you are showcasing an image to a client or within a portfolio, it should be of a quality which the viewer should not need a manual to decipher its unique and mysterious contents. Any text you provide along with the image or project should add real value and not be used as a crutch to explain a substandard design.
Secondly, the employer or client does not need to know the entire history of the project. A project summary should be just that – a summary! Within a few sentences, give information about the size, region, and function of the project, but remove all extraneous or superfluous information.
If there are additional questions that the employer has on a particular project, or more detail you’d like to provide, save it for the interview or initial phone call. Layout space within a portfolio is limited – keep the unnecessary text off the page.
For understanding all the ins-and-outs of typography (designing with text), I have always referenced the book The Elements of Typographic Style by Robert Bringhurst. It is an invaluable resource that I have found very helpful when making choices about text size, color, and formatting.
Tip #4: Optimize Your Image Resolution
One of the most difficult parts of designing a portfolio is the balance between high-resolution images and file-size. Most designers struggle with developing a portfolio that negotiates between these two very important attributes. Resolution of images is typically rated by “DPI” or dots-per-inch – the higher the DPI level, the better the resolution and greater the file size. Depending on the software you are using, there should be an “adjustments” dialog box which allows you to edit the image size and resolution. If you do not own software such as Adobe Photoshop, you can also utilize online photo-editing software like Photopea to modify image resolutions for your portfolio.
From my experience in using most photo-editing software, there are some basic JPG or TIF standards that can be used which allow for the best file-size without sacrificing image quality. My recommendation for a standard 18” x 24” portfolio is to utilize a DPI 0f 180. The 180 DPI resolution will not sacrifice quality and will allow a greater reduction that the typical 300 DPI which can make the file easier to transmit via email.
Tip #5: Be Unique
One of the hardest things to do when developing a design portfolio is ensuring that it catches the eye of the employer and rises above the other portfolios – sometimes, being different helps. Not only will being “different” entice the viewer, but it also will create a memorable moment during the review process that may be the edge needed to win the job or client.
Developing a “different” looking portfolio does not necessarily mean sacrificing quality or creating an abstract design. In fact, there are many small changes you can make that can have a large impact. Here is a list of a few that I’ve seen that have made an impact:
- Cover Fold Out: Creating a multi-layered fold-out for your cover that showcases one of your captivating images
- Integrated USB: Having a Front or Back Cover that not only is thicker (a more tactile differentiation) but also holds a digital flash-drive which accompanies the portfolio with a digital image/video. I’ve used a cheap disposable USB like this one, which will allow you to send out several without breaking the bank. These flash-drives are also good because they can handle mailing transport without getting dislodged or broken.
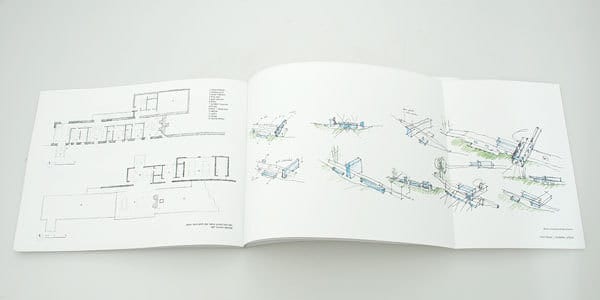
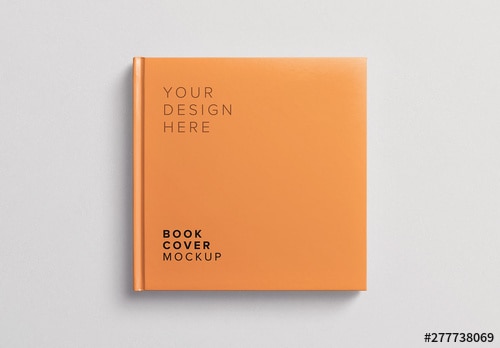
- Unique Book Size: Not all portfolios need to be your standard 8.5” x 11. By printing the portfolio in an unconventional size, yours will be highly visible within the stack of portfolios. Typically, a square shape, or elongated landscape format works best for creating this distinction. I like to use a self-publishing service like Blurb for creating these types of books.
- Package or Encase the Portfolio: Who doesn’t love the idea of unboxing a beautiful package. Your portfolio can create a great user-experience by developing a unique “package” that the reviewer unwraps. You can use a nice leather case or binder that not only holds not the design portfolio, but also has a resume, a writing sample, and letters of recommendation inside. One specific case I really like, viewed here, has always worked well for me when sending portfolios to clients.

As you can see, there are many choices that will need to be decided when designing your portfolio. Be sure to carefully consider your audience and professional goals when designing. If you want even more advice and inspiration on developing a portfolio, I would recommend purchasing the book Building Design Portfolios. It provides a bit more information on overall layout and formatting than I have covered here. I have referenced it several times in my own design career and have found it valuable.
Hopefully the tips I listed will help you in your future goals in working in the landscape field. If you’d like more information on the topics of landscape design and business management, be sure to check out our Design Resources and Business pages.
____________________________________
Important Legal Disclaimer: This site is owned and operated by Draftscapes. We are a participant in affiliate marketing programs designed to provide a means for sites to earn advertising fees by linking to participant vendors. Affiliations include Utrecht Art Supply and Amazon Associates. Draftscapes is compensated for referring traffic and business to these companies. Recommendations for products or services on this site are not influenced through the affiliation.