

In this article, we will be reviewing the body mechanics of design drafting. It might seem as though any drawing technique might work as long as you have the right equipment, but this is most often not the case. We’ll take a look at some tips for landscape drafting and I will show you how to draw with the proper form to create bold, beautiful, and confident lines.
What do I mean by body mechanics? It means how your body moves when drawing lines across the paper. Despite what you may think, this is an extremely important aspect for most artistic disciplines whether it is illustrative sketching, cartooning or design drafting.
The reason it’s so important revolves around the idea of muscle memory. When I was in middle school I remember my parents sending me off to a basketball camp for the summer. On the first day, the director of the camp lined us all up to watch him shoot free-throws. He shot basketball after basketball almost effortlessly with each one going in the hoop. He made almost 30 free throws in a row before missing and was very disappointed that he couldn’t make more. When he was done, he explained the mechanics of muscle memory and it still sticks with me today.
Believe it or not when your muscles contract to complete a certain exercise or task, neurons from your brain are sending signals down to your muscles to activate the muscle tissue. This is called muscle recruitment. The more repetition that you give toward that activity, the more muscle fibers become recruited to that task and the better accuracy you have with producing the desired result. This is true for both gross motor skills, like walking or running, as well as fine motor skills like drawing.
Muscle-memory is important for two reasons: First, you can easily develop bad habits when drafting that will be difficult to break because your muscles will want to move a specific way. Secondly, the more practice you do with the proper form, the greater your muscle memory will become and the better at drafting you will be in the long term.
So enough with the science, what is good form? There are two key things I want to go over concerning drafting form: Creating Bold Confident Lines and Keeping Drafting Pencil At The Proper Angle.
Creating Bold, Confident Lines
What do I mean by a confident line?
Let’s say we have two people trying to get from Point A to Point B. The first person has an idea of where he where Point B is, but isn’t exactly confident on how to get there. He stops, looks at his map, changes his direction, and then walks a little further and repeats this process until he finally reaches Point B. This makes for a very unconfident line.
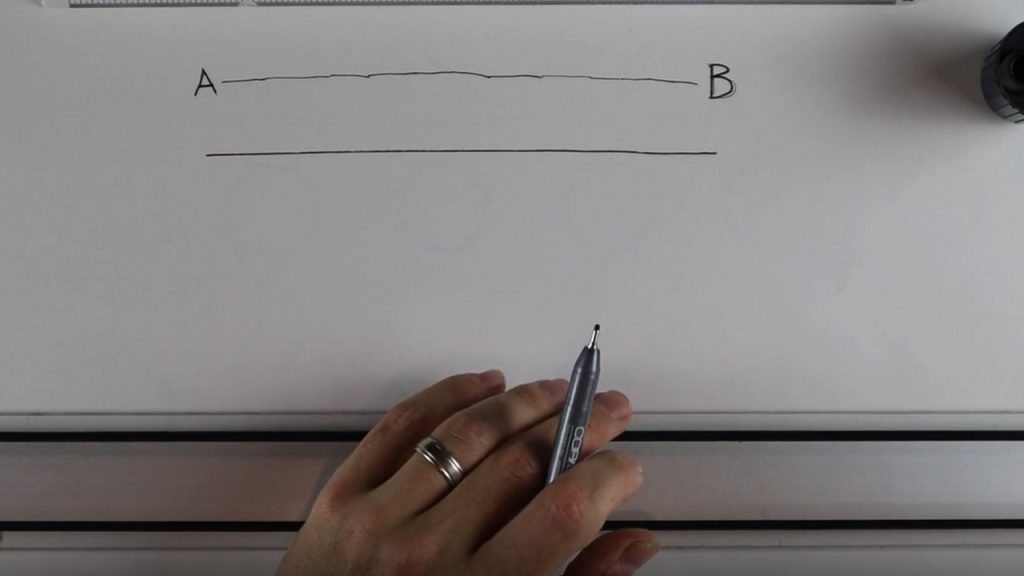
The second person, she is very confident. She knows exactly where she’s going and although she might move a bit from side to side, she has a direct path to get there. This makes a very confident and much quicker line.
There are two things you can do to ensure bold confident lines. The first thing, which is the most helpful and the easiest, is using the proper equipment. A good T-Square, parallel rule, or triangle will make your lines much more bold, crisp, and confident when drawing or drafting.
The second thing is much more difficult and requires some practice. This is the act of pulling your line across your body and away from you. I’m sure you are thinking, what does this mean?
If you look at your arm, there are four joints along its length – shoulder, elbow, wrist, and fingers (we are counting the finger joints as one unit rather than individual sections). Each of these joints can have interior flexion (meaning they are being contracted toward you) but only your wrist and shoulder can produce significant exterior flexion (extending out beyond the joint).
This means that when drawing, you have the ability, with proper mechanics, to have greater accuracy when drafting outward away from your body by pulling from your shoulder, and less accuracy if you were to just push the line through your body. This technique is true for both drawing horizontal and vertical lines as we will see. It is also important for lettering, which we will cover in a completely separate video.
Drafting Pencil at Proper Angle
The next item we need to cover is the drafting pencil or pen and how it rests on the paper and how we hold it in our hands.
I will add links to the specific tools I am using in this lesson, but just make sure to also look at the Recommended Tools article to get a good overview of the other items you will need when drafting or drawing landscapes.
Let’s first talk about the 2mm lead holder. I am using the lead holder with 2B graphite, which will make nice dark lines. Before I go straight to drafting, I will first sharpen it by exposing some of the lead, and then pulling it in a circle through the sharpener. After this, I just dab some of the excess graphite off on the plug and then draw the quick but famed sacrificial tree off to the side.
If we just sharpened the pencil, why would we create this silly drawing?
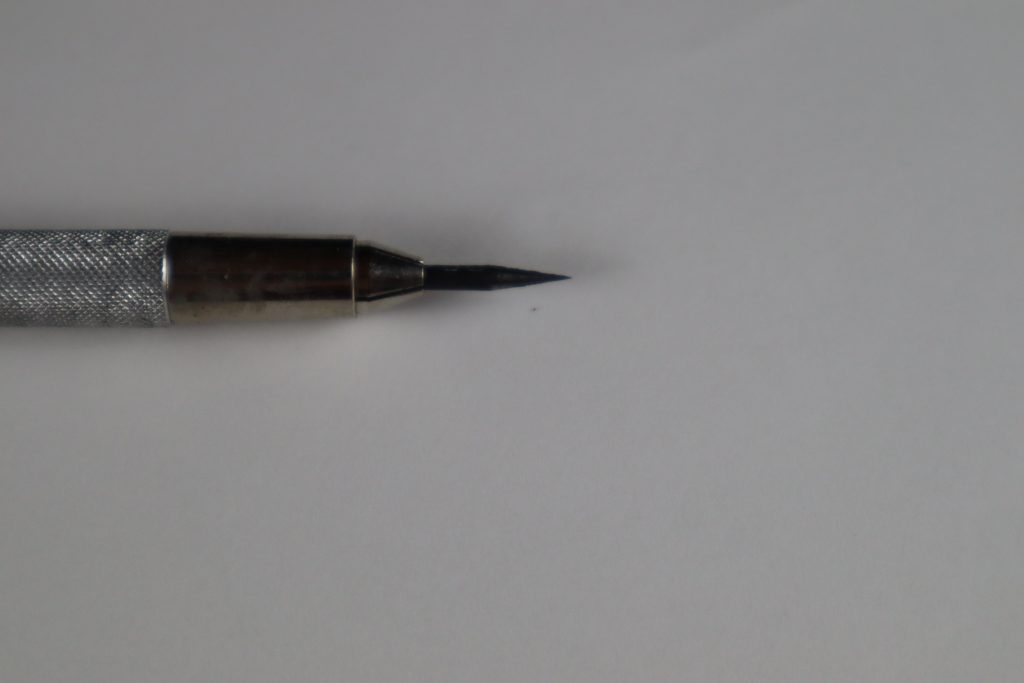
Well after you’ve sharpened the lead, it has a needle-like point at the top, which can and will easily break after drafting. By quickly doodling a tree, you round off the edges and make it a smoother more usable tip for drafting. Think of it as if a painter were dabbing off excess paint from his brush before placing it on the canvas.
Next, you want to hold the pencil at approximately a 90-degree angle. I say approximately because I don’t want you to be forcing yourself into a tense or uncomfortable position. Just try and think about how you usually write. Typically the angle of standard penmanship is about 60-75 degrees. So we want to tilt the pencil slightly beyond that point. Why is this?
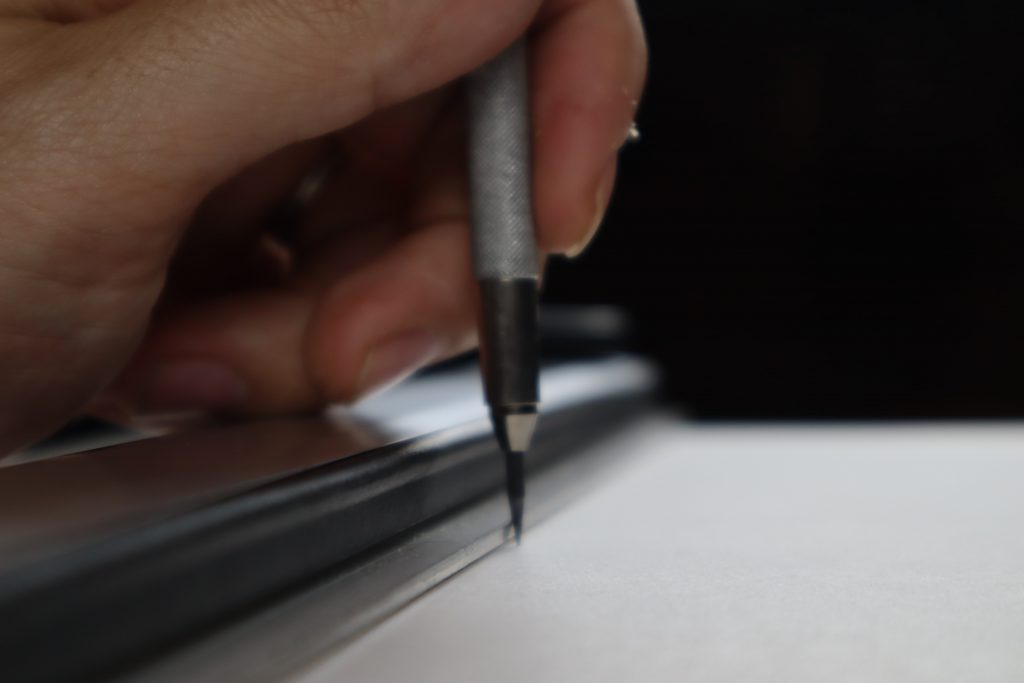
Correct Position 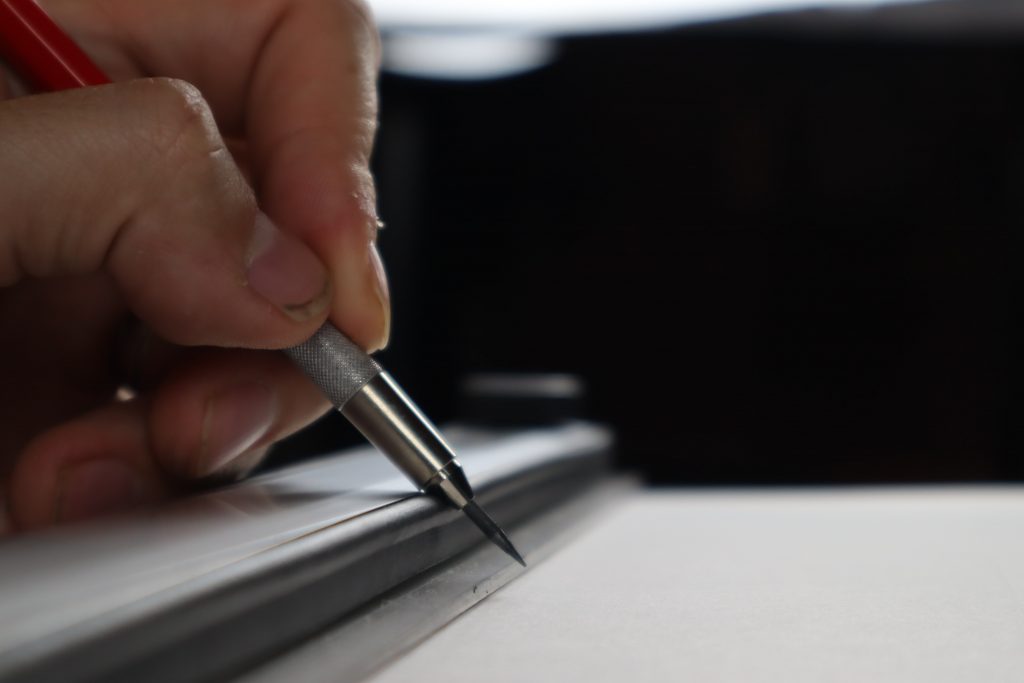
Too Shallow 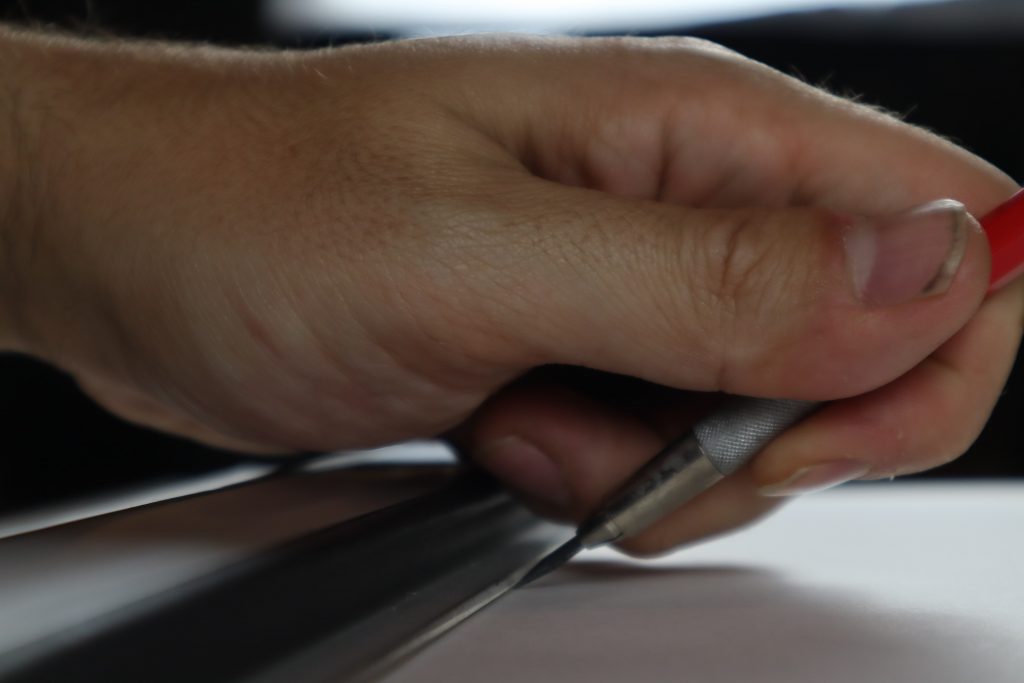
Too Steep
There are two reasons: First, if we draft at too shallow an angle, the pencil lead will not rest evenly along the straight edge and we will not have the appropriate assistance to draw a crisp clean line. Second, if we draft at too steep an angle, we will be pushing the point of the lead into the corner of the straightedge and paper which not only causes issues of smudging but quickly wears out the sharpness of the lead.
Practicing Lines
Ok so let’s practice drafting our first lines!
We will start at the top and work our way down. Start with your drawing hand crossing your body. Press the pencil down and sweep it across using your shoulder as the pivot, keeping your forearm, wrist, and fingers as stable as possible.
When I stable, I do not mean tense. We don’t want your muscles to flex, we just want a calm comfortable relaxed stroke. Try this exercise three more times to create four parallel horizontal lines roughly an inch or two apart. As you progress, keep practicing this simple exercise and you will soon feel very comfortable and confident when making your lines.
Next, we want to practice vertical lines. We utilize our triangle for this. It rests along either the T-Square or Parallel ruler, opposite of your drafting hand – we do not want your hand to be resting on the triangle itself. We will place the triangle at a starting position that is closest to your drawing hand.
Some teachers or graphics books will teach to simply push the line from the bottom corner upwards, but I believe this is a mistake and has never worked for me. It usually results in a poor line that smudges at the bottom. So I advise you to position yourself at a comfortable angle to your board – if you’ve seen my other videos you know that I typically like to stand while drafting. Place yourself at a comfortable angle so that your drawing hand will mimic the previous exercise.
Please do not place yourself in a strained position, just angle yourself to whatever feels comfortable and make the best line. Practice will be necessary to find what works best for you. Once you are in this position draw the vertical line starting from the corner of the triangle and T-square across your body to the end of the triangle. Move the triangle down about 1-2” and practice the line again. Do this for a total of 4 lines.
Maintaining Sharpness
The final topic I want to review is how to maintain a relatively sharp point while drafting. When you hold your pencil on the paper, try to roll the pencil between your thumb and index finger. It doesn’t matter which direction your roll your thumb, but I have found rolling it upward will feel more natural.
Practice the same 8 lines, four horizontal and four vertical using the same techniques, but with rolling the pencil to maintain sharpness.
Drafting with Pen (Ink Drafting)
When drafting with ink, most of the same principles that we reviewed still hold true, but there are two other items we should discuss.
First, you need to make sure that you are using straight edges with beveled edges, also referred to as inking edges. These edges prevent the ink from bleeding underneath the ruler and smudging. If you already watched my recommended tools video, you should have already purchased the right types of edges.
Second, when drafting in ink, you would typically utilize a drafting paper, often referred to as drafting film, which is called BoPET an acronym for biaxillary-oriented polyester film. Most of the time draftsmen simply refer to it as Mylar which is the most common brand name. Mylar usually has a rough side and a smooth side. You would want to make sure you are drafting on the rough side. For a longer explanation on what drafting paper you should be using – be sure to review this article.
You can now practice the same exercises that we just covered for proper drafting mechanics in both ink or pencil. After some practice, you will be quickly drafting like a professional in no time!
For more design articles and drafting tutorials, please take a look at the Design Resources section of our website.
____________________________________
Important Legal Disclaimer: This site is owned and operated by Draftscapes. We are a participant in affiliate marketing programs designed to provide a means for sites to earn advertising fees by linking to participant vendors. Affiliations include Utrecht Art Supply and Amazon Associates. Draftscapes is compensated for referring traffic and business to these companies. Recommendations for products or services on this site are not influenced through the affiliation.