

One of the most important aspects of drafting a beautiful illustrative landscape design for a client is the drawing and rendering of the plants, specifically trees. Many books or videos on landscape design often just give a series of different graphic symbols without any guide as to what types of trees they are drawing or how to make the symbol similar to the actual plant the designer is specifying.
In this article and the next several ones to come, I will be reviewing how to draw a wide array of trees and detailing the specific ways you can use them within a landscape plan, whether it is specimen tree, a grouping of conifers, or just a simple flowering shrub. Today, we will be focusing on drawing one of the basics – ornamental deciduous trees.
Trees can come in many sizes, shapes, and colors. And they have a number of different functions in a design, whether it is a canopy shade tree, a specimen planting, or even a small grouping of fruit trees for an edible landscape. Whichever tree you decide to use, your graphics should reflect it as realistically as possible. So in today’s lesson we are going to start that process with the standard ornamental deciduous tree.
These are the common street trees or larger canopy trees you might see at a public park or plaza. I am separating the lesson from some of the smaller flowering deciduous trees, because I will review those in the specimen tree lesson.
In this article, we will be using the following tools: a circle template, lead holder, and Copic Multiliner Pen Set. I will start by drawing five 2” wide circles as my guides.
Base Graphic
We will start by laying our circle template on the board and drawing 5 light circles in a row with our lead holder.
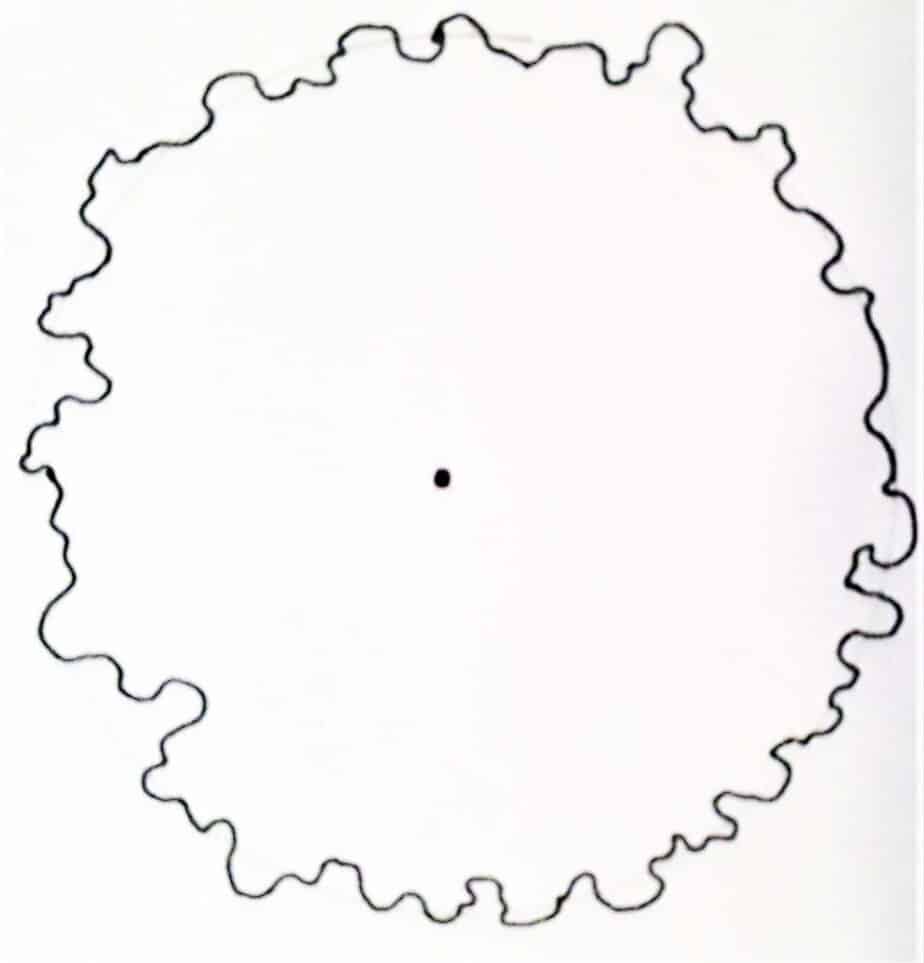
Now that the templates are down, we’ll start with our first tree and draw in a simple contour style. Now what does contour style mean? Well, it means we are only drawing the outside edges of the tree canopy. I like to use the image of crumpling a piece of paper up and then only drawing the outside edges of it. It is a very similar technique.

You want to make sure you pay close attention to the types of edges you are creating. We don’t want to follow the template too closely, otherwise it will look much too uniform and unnatural. Instead, we want to move our pen inside and outside of the guideline, but always returning back to the original template until we have the full tree.
When completed, you will have a very basic tree shape. This symbol should be used as your bare standard boring deciduous tree. It can be used for large maples, London plane trees, Elms, Sweetgum and others. The nice thing about this basic tree is that it can be added to in order to create emphasis or complexity. So let’s draw it again and see how.
Adding Complexity
For the second template, we are going to repeat the exact same thing.
Now, instead of just leaving it, we can add some extra detail. So let’s add some texture to it by drawing some small triangles or polygons on the inside, this will make it look as if the canopy is opened up and we can see through. We want to use sharper edges still, which is why I said triangles and polygons because the trees we are intending to replicate typically have a toothier or sharper leaf margin/edge.
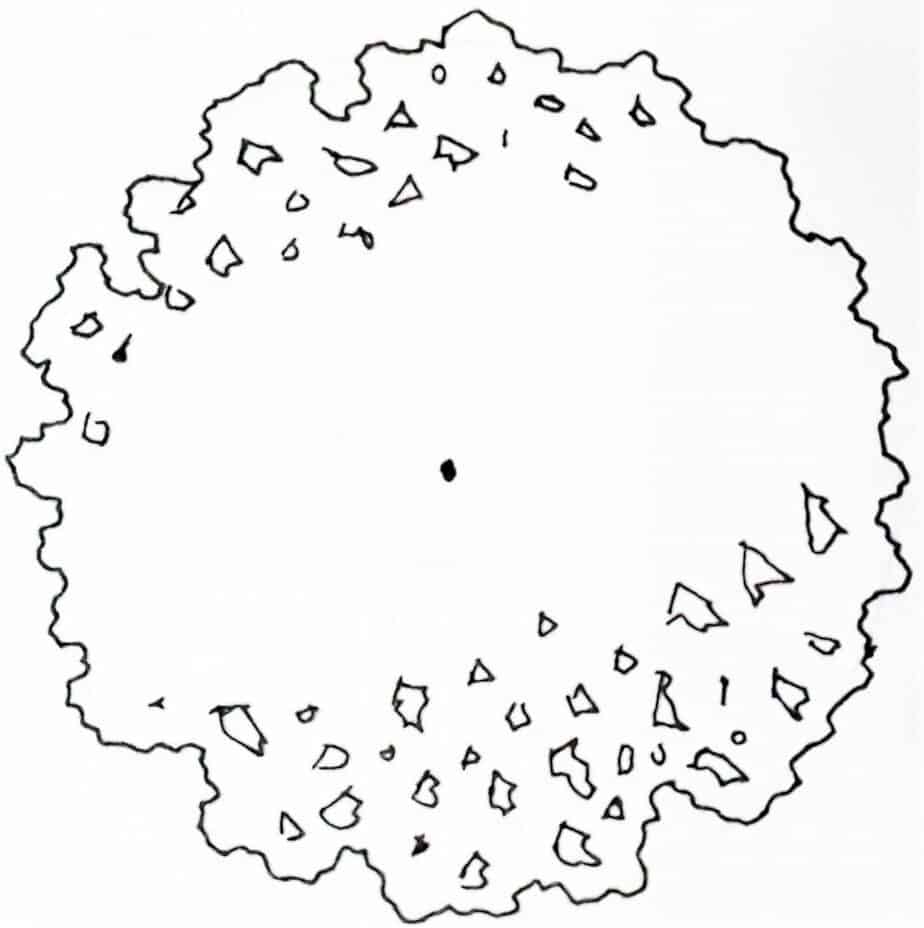
If we were drawing something like a Linden or a Callery pear, we might want to round out the edges a little more. We will try that next.
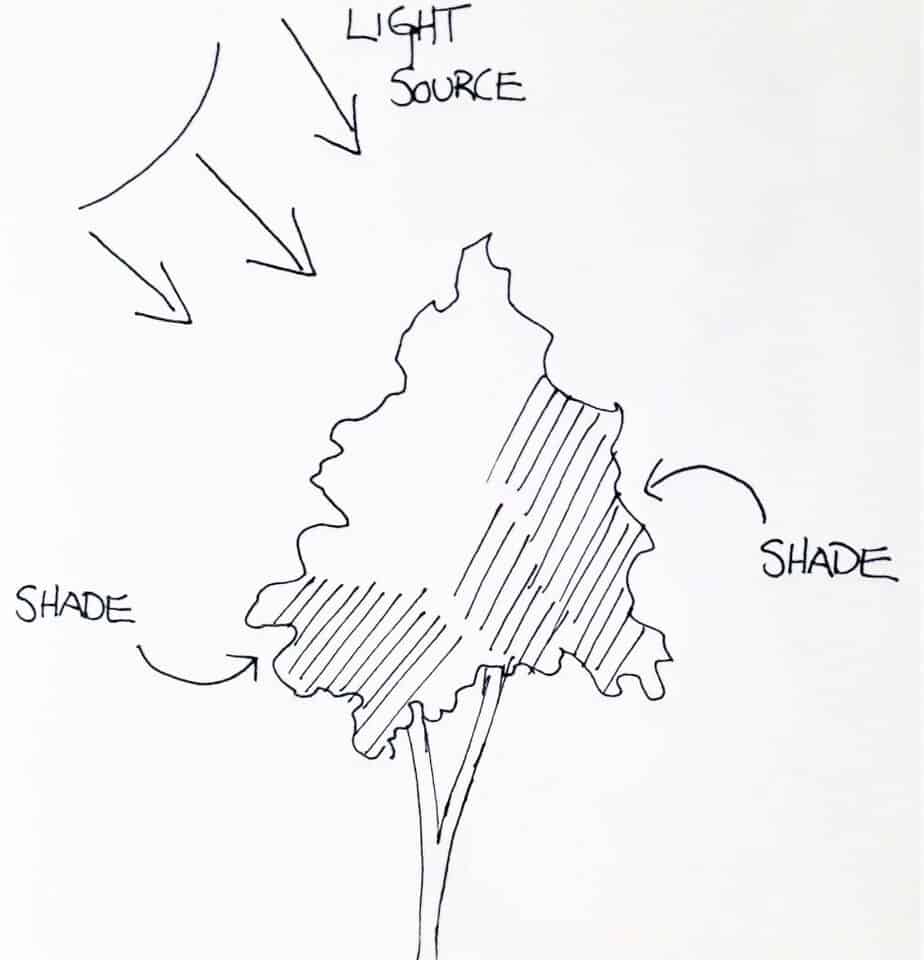
So now we have some detail within the canopy. Now this detail isn’t just randomized – notice how I kept the shapes around one edge of the base, with a little bit extra on the other side. This is to replicate the natural light direction in the plan.
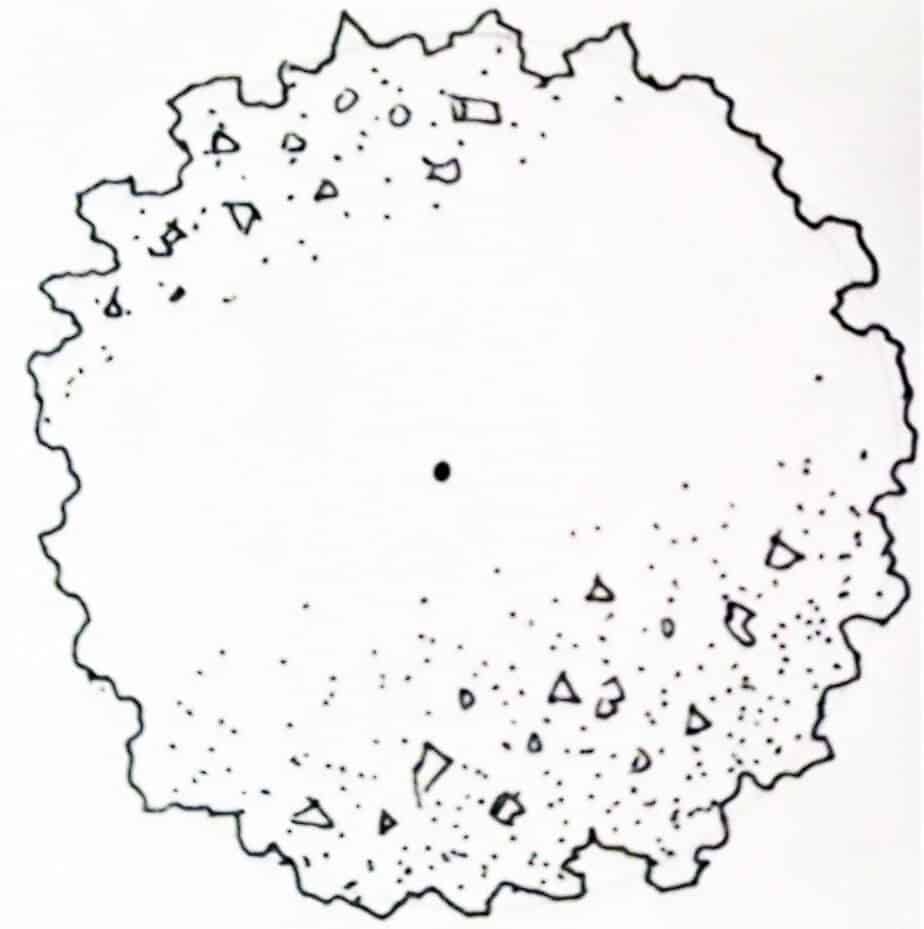
We can emphasize this lighting effect even more by stippling.
Stippling is a common rendering technique for trees in which we use tiny dots in various concentrations to form shade and three-dimensionality. When you implement stippling, you don’t want it to be uniform, like chicken pox over the entire tree, it should be heavy in some areas and slowly transition to lighter in others. Also, we want to ensure we are making simple dots and not lines, we don’t want it to look like chicken scratch.
Modifications / Adjustments
So now let’s get back to the example, I stated earlier, where we want to draw a canopy of a shade tree with more rounded habit or rounded margins. We can use the same technique, but rather than have these steep sharp edges, we will just have a smoother approach with no jagged edges. This can be a nice look for trees such as Linden, an Ash, Callery Pear, or even a Japanese Tree lilac
And we can also add in similar features within the canopy the same way we did with the previous tree.
Open Canopy
So know we have the standard base, with two modifications to give us a little more detail. Now we can add in other elements to this graphic to make it look a little different, in the case we want to add emphasis or a little more detail to the drawing. Perhaps we have a grouping of plants, but want to showcase the tree a little more.
The first would be to open the canopy up, make it a little lighter and have more textures
To do this, we will start with the standard base graphic but instead of making it just a single unit, we will separate it into three sections. A large, a medium, and a small section.
From there we can add in a little detail on each one, along with a few branches to connect them. This offers a little more detail and also offers a bit more of an airy, or open look to the tree which can be good for a selection like a Honey Locust for instance.
Finally for our last tree, we can take that same look but do slightly different shading with hatching. Hatching is simply the process of making parallel lines in different concentrations, closer together or farther apart, in order to create a shading or three-dimensional effect much like stippling.
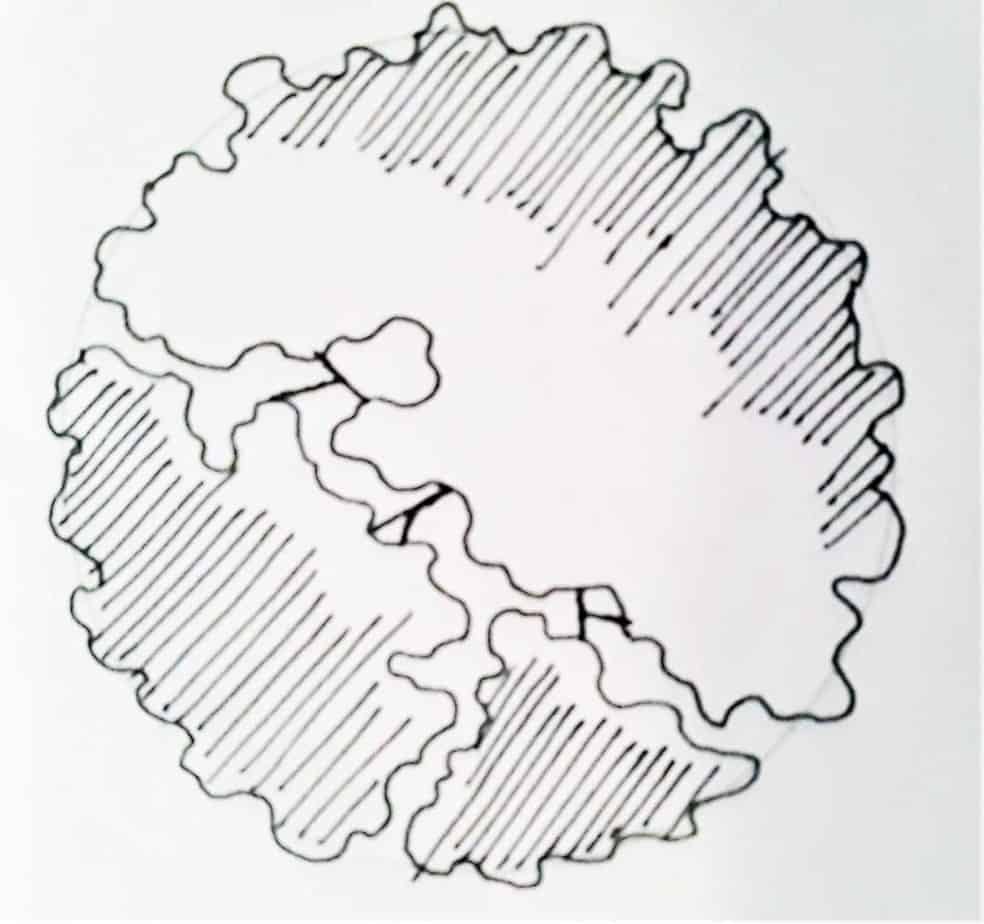
We can also cross-hatch but we will save that for a separate lesson.
When we are hatching, you want to move in one direction, typically form the top, and work your way downward in successive fashion. When complete you can have a beautiful looking tree, with a nice amount of complexity, that can really standout in your design.
So that will complete this lesson on drawing ornamental deciduous trees. If you found this helpful, please be sure to read our other drafting and drawing tutorials under the Design Resources area of the website.
____________________________________
Important Legal Disclaimer: This site is owned and operated by Draftscapes. We are a participant in affiliate marketing programs designed to provide a means for sites to earn advertising fees by linking to participant vendors. Affiliations include Utrecht Art Supply and Amazon Associates. Draftscapes is compensated for referring traffic and business to these companies. Recommendations for products or services on this site are not influenced through the affiliation.