

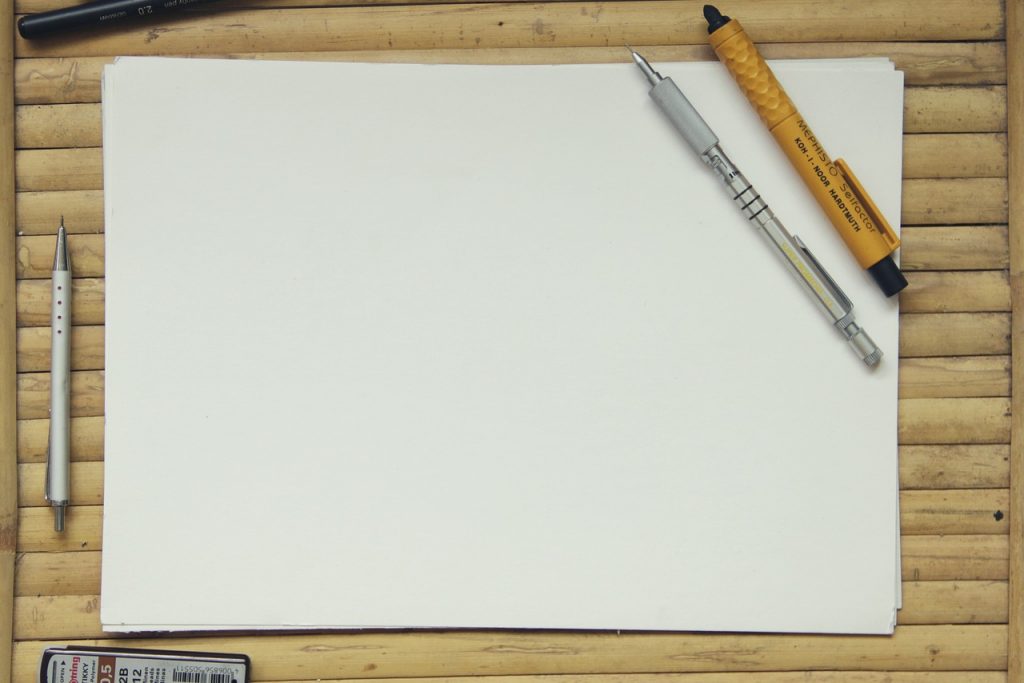
In this article, I review the best beginner drafting tools to create professional and beautiful illustrative plans for clients or studio classes. Whether you are just starting, or are a professional landscape designer, hopefully, this will provide you a good reference on what to purchase and how to select quality tools for your drafting needs.
To those individuals beginning their studies landscape architecture or design, all of the various pieces of drafting equipment needed to get started might seem overwhelming. As you move through the lessons on our website, you will often see me utilizing a wide variety of pencils, pens, guides, and templates. I wanted to create this article as a starting point so that if you wish, you can follow along with the videos and have the standard drafting tools at your disposal as we go.
The first thing that I want to make note of is that you should not delay practicing your drafting, or waiting to draw landscape designs just because you feel you don’t have the “right” materials. If you don’t have access to any of these items, or simply can’t afford them, it doesn’t matter. Take whatever pen or pencil you can find, on whichever paper you can scrounge and just start drawing anywhere you can find space.
No matter what materials you are using or wherever you are using them now is always the best time to work on the fundamentals of creating crisp lines – then move forward with the proper drafting equipment as it comes available.
So for today’s introduction to drafting tools and equipment, we will start from the ground up.
Drafting Table / Workspace
First, you will need a workspace or a table. It doesn’t need to be a fancy studio desk or drafting table like you see here, but it should be an area with enough room for you to spread out your documents and provide ample workspace for a standard 24” x 36” paper. So it can be a regular desk or even a kitchen table. You just need to find a nice level flat area.
Also, I would suggest that you find an area in your home or office that will be a dedicated area for drafting. You shouldn’t try to draw plans in coffee shops, restaurants, or anywhere outside where you need to pack up and travel with your materials. You really shouldn’t be traveling too much with your plans or tools. If you have a home office, you can keep them there. Or if you have an actual office or studio, leave your materials and plans there.
Lighting
Another feature you need to consider is the lighting. The area you are working in should have a good natural or supplemental lighting. Typically the more light you get, the better. If you’d like to get more technical with this, the light intensity is measured by footcandles (or if you are using metric units, lux).
The standard lighting requirements for office spaces are around 20 footcandles or around 215 lux. For detailed tasks such as drafting, you should be looking to receive about 50 foot-candles of light or around 530 lux. Digital light meters are easy to find online or you can simply download them via an app on your phone.

If you find that you do not have sufficient lighting, you may want to invest in a drafting table lamp. In some cases, when purchasing a drafting table, it comes with a lamp as a kit, but if you are buying a table or lamp separately, I would recommend the OttLite LED Crane Lamp with Clamp (linked here)
It can switch from a regular table lamp to a clamped studio lamp and provides more than enough diffuse light for drafting purposes.
With poor lighting, not only will it make it difficult to see what you are drafting, but you will end up straining your eyes over the long run. So take the time and make sure you have good lighting before finalizing your drafting setup.
Drafting Board
The next thing to consider is a drafting board. Drafting boards come in a variety of shapes, sizes, and have all sorts of different features. When selecting a drafting board, you should choose one that is large enough to handle the paper sizes you will be working with. I’ve found 24” x 36” to be perfect for most applications.
Also, the board should have a well-machined edge. What I mean by this is that there should not be any divots or large scratches along the edge and the corners should make an accurate 90-degree angle with each other. If the board comes with a carrying handle that folds down and does not get in the way of the actual drafting surface, this feature can come in handy.
You will also often see boards that are more for artistic drawing than drafting. These art boards typically have handles on top and clips along the side which are meant for traveling or standing while drawing with them. These aren’t drafting boards.
These boards are fine for many other applications like sketching or drawing, but shouldn’t be your first choice for drafting. The clips will get in the way of squaring your paper. They are very thin and flimsy when compared to regular drafting boards, and their edges are rounded, making them inaccurate when using a T-Square. So, although their price makes it seem like an attractive option – I would steer clear.
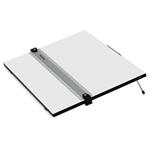
For a quality drafting board, I would recommend the 24” x 36” Blick Portable Drafting Board with a parallel ruler (linked here).
Some boards, like the one I use, come with a parallel rule. I happen to like these as they stay mounted to the board, allow for quicker drafting of parallel lines and can always be adjusted if needed.
T-Square
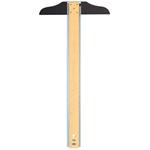
If you purchase a board that doesn’t have a parallel rule, that is fine, but you will need this next item, which is a T-Square. The purpose of a T-Square is to rest along the side edge of the board and allow you to make consistent parallel lines up and down the drawing. The T-Square works in unison with the board to ensure you are creating accurate and parallel lines.
Due to the T-Square’s reliance on the edge of the board to make accurate lines, this is why it is important to purchase a board that has a well-manufactured edge. If the board were to have an angle along the side, the T-square would not be able to be lined up correctly and you would have consistently skewed lines.
T-Squares come in many different sizes and styles. First, you need to make sure that the T-Square is long enough to reach all points along the paper. So if your board is 36” wide, the T-Square you purchase should be at least that long. My preferred choice for a T-Square would be the Westcott T-Square (linked here).
There are metal T-Squares and wooden ones with plastic edges. I would highly recommend the wooden ones with plastic edges instead of the metal ones for two reasons. First, they have a greater thickness to them which will assist in drafting lines with both pen and pencil. When using the metal ones, I have found it very easy for beginners to slip their pencil right over the slim profile of the ruler creating an irregular mark on their paper and essentially ruining their lines and plan. The thicker edge prevents that slippage from happening.
Drafting Chair
You will notice as of yet, I have not discussed anything related to chairs. There is a particular reason for this. I for one, like to stand while I am drafting so I rarely found the need to be very selective with chairs or stools. What I would advise is to simply choose something that fits with your specific design style.
If you are like me and stand more often than not, then a cheaper adjustable drafting chair will do just fine. If however, you find yourself always wanting to sit and be more comfortable when drafting, then you should find a more ergonomic drafting chair that suits those needs. I would just caution investing too much time and money on the chair itself. It most likely will not have a visible impact in your drafting work and you may find as you progress over time, you prefer a different style over the expensive one you originally chose.
Paper
If you wish to draft plans for clients, you will need some type of paper on which do draw. Good drafting paper can be purchased through a variety of different vendors to suit many needs. For a more in-depth discussion on the various styles of drafting paper and their purpose, please look at my article: Which Drafting Paper Should I Use? Complete Guide to Bond, Vellum, and Mylar, and Tracing Paper.
Drafting Pens & Pencils
To draft with proper line weights, you should have several different styles of drafting pens and pencils.
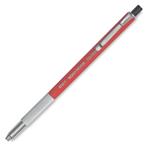
For drafting pencils, I would recommend first to have a 2mm Lead Holder. This is simply a mechanical pencil that holds 2mm graphite for larger bolder lines in drafting. A common brand that has consistently above-average ratings is the Kohinoor Technigraph Lead Holder (linked here)
For finer precision of multiple pencil line weights, you can purchase individual pencils of the standard drafting sizes (0.3mm, 0.5mm, 0.7mm, and 0.9mm) or just purchase a set that includes all of the widths you may need. If you are just starting and are unsure what pencil width you might need. I would suggest purchasing single pencils of 0.5mm and 0.9mm and not an entire set.
For individual pencils, I recommend the Alvin Draftmatic (linked here)
For an entire set, I recommend the Pentel Graphgear Mechanical Pencil Set (linked here)
You will also need a sharpener for the pencils – they do not utilize a standard electric office-style sharpener. Basically, there is not much to look for, just purchase whatever is available. I would suggest the Alvin Rotary Lead Pointer (linked here).
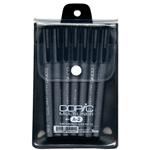
As for drafting pens, there are several options available from beginner to advanced sets. From my experience, I have found the standard beginner sets break easily and have quality-control issues, but the advanced sets are much too difficult to use for new drafters. The advanced sets also require more care and cleaning to work properly. For these reasons, I often recommend a nice intermediate set, the Copic Multiliner Technical Pen Set (linked here).
This set offers a high-quality professional look and is durable enough to serve a designer for a long time. It also comes with the standard pen width sizes of 0.03mm to 1.0mm.
Scales
You will also need specific types of drafting scales to design and draw landscapes accurately. Depending on the size and style of the project you are completing, you may need an Architect’s Scale or an Engineer’s Scale. If you are just starting, it is best to simply buy both as you will undoubtedly use them.
The scales typically do not go through too much wear-and-tear over the years if used properly, so this will most likely be a one-time purchase. If you are unsure which to purchase or how they are used within drafting, please see my other article: “How to Use an Architect’s & Engineer’s Scale”.
My recommendations for both are linked here: Architect’s Scale and Engineer’s Scale.
Triangle
A drafting triangle is a very useful tool for creating vertical lines on a plan. It is also an important tool when making parallel lines that are at varying angles.
There are three styles of triangles that designers could use when drafting. The first style is a standard triangle set with angles of 45/90 and 30/60. These can come in various lengths and heights, but the angles of the triangles allow for a wide array of line types. For most drafting applications, they are very useful.
The second style is similar to the first but is for inking. These come in the same 45/90 and 30/60 angle specifications but come with a double-beveled edge along all three sides. These bevels keep the edges of the triangles off of the paper to prevent smudging of ink for final drafts. If you consistently use ink for final plans, they are essential.
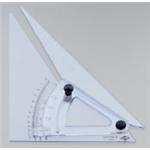
The third type of triangle is an adjustable triangle. I find these triangles to be the best style for landscape drafting. They allow the designer to draw a multitude of parallel angles with one triangle, without having various triangles to choose from.
The adjustable triangle can also come with a protractor for accuracy and precision when drafting angles. Also, these triangles can come with inking edges similar to the previous triangle style for final drafts. I believe they are very valuable for new designers and would recommend them for any starter kit. More often than not, I find myself reaching for my adjustable triangle over the other types. The Chartpak Adjustable Triangle is a standard type (linked here).
Circle Template
The circle template is another important tool for landscape architects and designers for drafting trees, shrubs, furnishings or for making nicely rounded corners or turning radiuses for plans.The circle template allows us to create accurate well-defined circles or arcs.
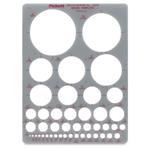
Similar to the other recommendations, I prefer using a single template with a wide array of circle sizes over having various sets to pull from. Also, the specialized landscape templates which offer stencils of trees and other garden features should be avoided. They are not very useful and often develop poor drafting habits. For a more thorough review on circle templates and how to use them, be sure to review my article: “How to Use A Circle Template”.
A standard quality circle template for beginners is linked here.
Ames Lettering Guide
One of the key skills of landscape drafting is lettering. Creating high-quality standardized lettering is a valuable tool that needs to be consistently practiced. An Ames Lettering Guide assists the designer in establishing parallel guides of specific dimensions in which to align your letters.

It will take a little while to learn how to use the guide and all of its various attributes, but with some practice, it should not be difficult. The Ames Lettering Guide is the standard in the industry, so there are no other real options that would we worth discussing. You may not be able to purchase these at your local art store depending on your location. Here is a link for online purchasing.
For a review on how to properly use an Ames Lettering Guide, please make sure to check out my video: “How to Use An Ames Lettering Guide”.
French Curves
Unlike the fields of architecture and engineering, landscape designs often have organic or natural shapes that are difficult to create with the regular straight edges of a scale or T-square. French curves assist the designer in forming these curvilinear lines without having to completely freehand the movement.

A standard set of French curves usually has 3-5 different styles of curves so that you can find a combination that best fits your particular design application. There are also flexible straight edges, which essentially can be molded into a particular curve and then traced over to finalize the design. Either of these options are perfectly acceptable, however, I learned through using French curves and so that will be the tool I use more often than not. A standard set of French curves is linked here.
Vinyl Eraser & Erasing Shield
Unfortunately, accidents happen while drafting, so you will need a good quality white vinyl eraser along with an erasing shield to protect your other lines. Erasers actually can come in a variety of shapes and sizes, so it may be difficult to know which one would be right for you.
First, I would discourage you from purchasing a kneadable eraser (the rectangular gray or blue kind that you fold over itself). These types of erasers are not for drafting, but rather sketching. They are good for getting lots of graphite off of a surface but very poor at detailed work.

Instead, you should look for an eraser that is white vinyl and can clean up small areas (which means no large blocky erasers). I have found tremendous success with the pencil-type retractable erasers, like this one from Staedtler. It can be refilled when necessary (you will get several years of use before needing to worry about refilling) and has good ergonomics along with precision.
You can also try the battery-operated erasers, like the popular Derwent eraser. These are an attractive choice to try without having to spend a lot of money (link here).
Colored Pencils & Illustrative Markers

If you wish to make truly stunning design plans, then you will eventually need to render in color. The subject of color pencils and markers for illustration is much too broad and detailed for this article. In the coming months, I will be putting together a more comprehensive article on using colored pencils and markers and will provide insight into purchasing considerations. For now, I would advise getting a starter colored pencil set to practice with. Prismacolor is a brand with a great reputation within the design fields and their sets are easy to find. A good beginner’s set can be found here.
Conclusion
As you can see, there is a wide variety of tools and materials that a designer needs to draft professional-quality landscape plans. I hope this guide to some of the best beginner drafting tools was helpful.
I want to reiterate my initial statement from before, that you should not feel as if these tools are necessary for you to start your journey in designing. If you are interested in landscape design, you should start immediately practicing your skills on whatever is available until you obtain better supplies. This way you will have developed good fundamental drafting techniques that will look even better with the right equipment.
Over the entire website, you will find our drafting series of articles and videos. These will show you how to utilize these recommended tools to create beautifully illustrated spaces for clients or courses. With proper care, these items can last decades and be a great investment in your future landscape design career.
_______________________________________________________
Important Legal Disclaimer: This site owned and operated by Draftscapes. We are a participant in affiliate marketing programs designed to provide a means for sites to earn advertising fees by linking to participating vendors. Affiliations include Utrecht Art Supply and Amazon Associates. Draftscapes is compensated for referring traffic and business to these companies. Recommendations for products or services on this site are not influenced through this affiliation.